Wednesday, September 21, 2016

100 + Year Old Mantle


My grandparents, who live in Atlanta have a 2nd home in Carnesville, GA a little town north east of Atlanta. They both grew up in Carnesville and each July my family spends a weekend there.  In 1985 they purchased their home, a beautiful house built in 1910. It is everything a country home should be...warm, inviting and just oozing with southern charm. This past July, my PapaJack was showing us some items in his garage when we came upon a mantle. It was hard to get a full glimpse of the mantle as it was partially covered with other furniture, but we could tell it was cool and it became even cooler when he told us it belonged to his mother. 


He said we could have it if we had a place for it. Brent and I talked it over and decided we thought it could be a really cool feature in our dining room. We have two fireplaces in our house, one in the living room and one in the dining room. 

Here is a shot of our dining fireplace situation:


While this fireplace is fine, it's no 100+ year old family heirloom so after confirming the dimensions would work we knew we wanted it! 

We headed up to Carnesville to pick her up and brought reinforcements with us in the form of Brent's mom Cindy and his brother Scott because PapaJack let us know this piece was REALLY heavy. He wasn't lying! At 85 1/2" tall,  57"wide and solid through and through, this mantle was a challenge to load, unload and maneuver into the house. 


Within the hour of getting the mantle into the dining room, Brent got out his tools and began removing the existing fireplace surround. 


We knew going into it there would be some modifications needed before the mantle could officially be set into place. But seeing the surround totally stripped down really got our wheels turing at the possibilities like the black marble....do we keep or change? We haven't decided...


As for the mantle itself we haven't quite nailed down what we are going to do with it finishing wise. 


If you look closely you will notice there are a lot of intricate details in the mantle, some of which have been damaged over the years, so we are definitely going to have to refinish and repair (where needed). Obviously we are not professionals in this arena, so we are going to do our research and plan to talk to professionals before attempting to do anything that would alter the integrity of the piece. 

We are so excited and honored to be entrusted with this family heirloom and we can not wait to watch this piece play an intricate part in bringing our entire dining room to life. 

All photos are my own. 

Wednesday, September 14, 2016

DIY TV Niche'


Sometimes you do big projects that take a lot of time, money and brain power. Other times you do simple things here and there that help bring a space to life. And then there are times you do something relatively small, that isn't the easiest, but is by no means the hardest and then you or in this case me, forget to ever even mention it to you guys. And with that, today I want to tell you about the niche Brent created on the side of our fireplace.


This little project was actually our very first DIY at the new house. In fact I believe it started the day we moved in. It may seem simple and hardly blog worthy, but take a look at what we had going on the day we got all moved in....


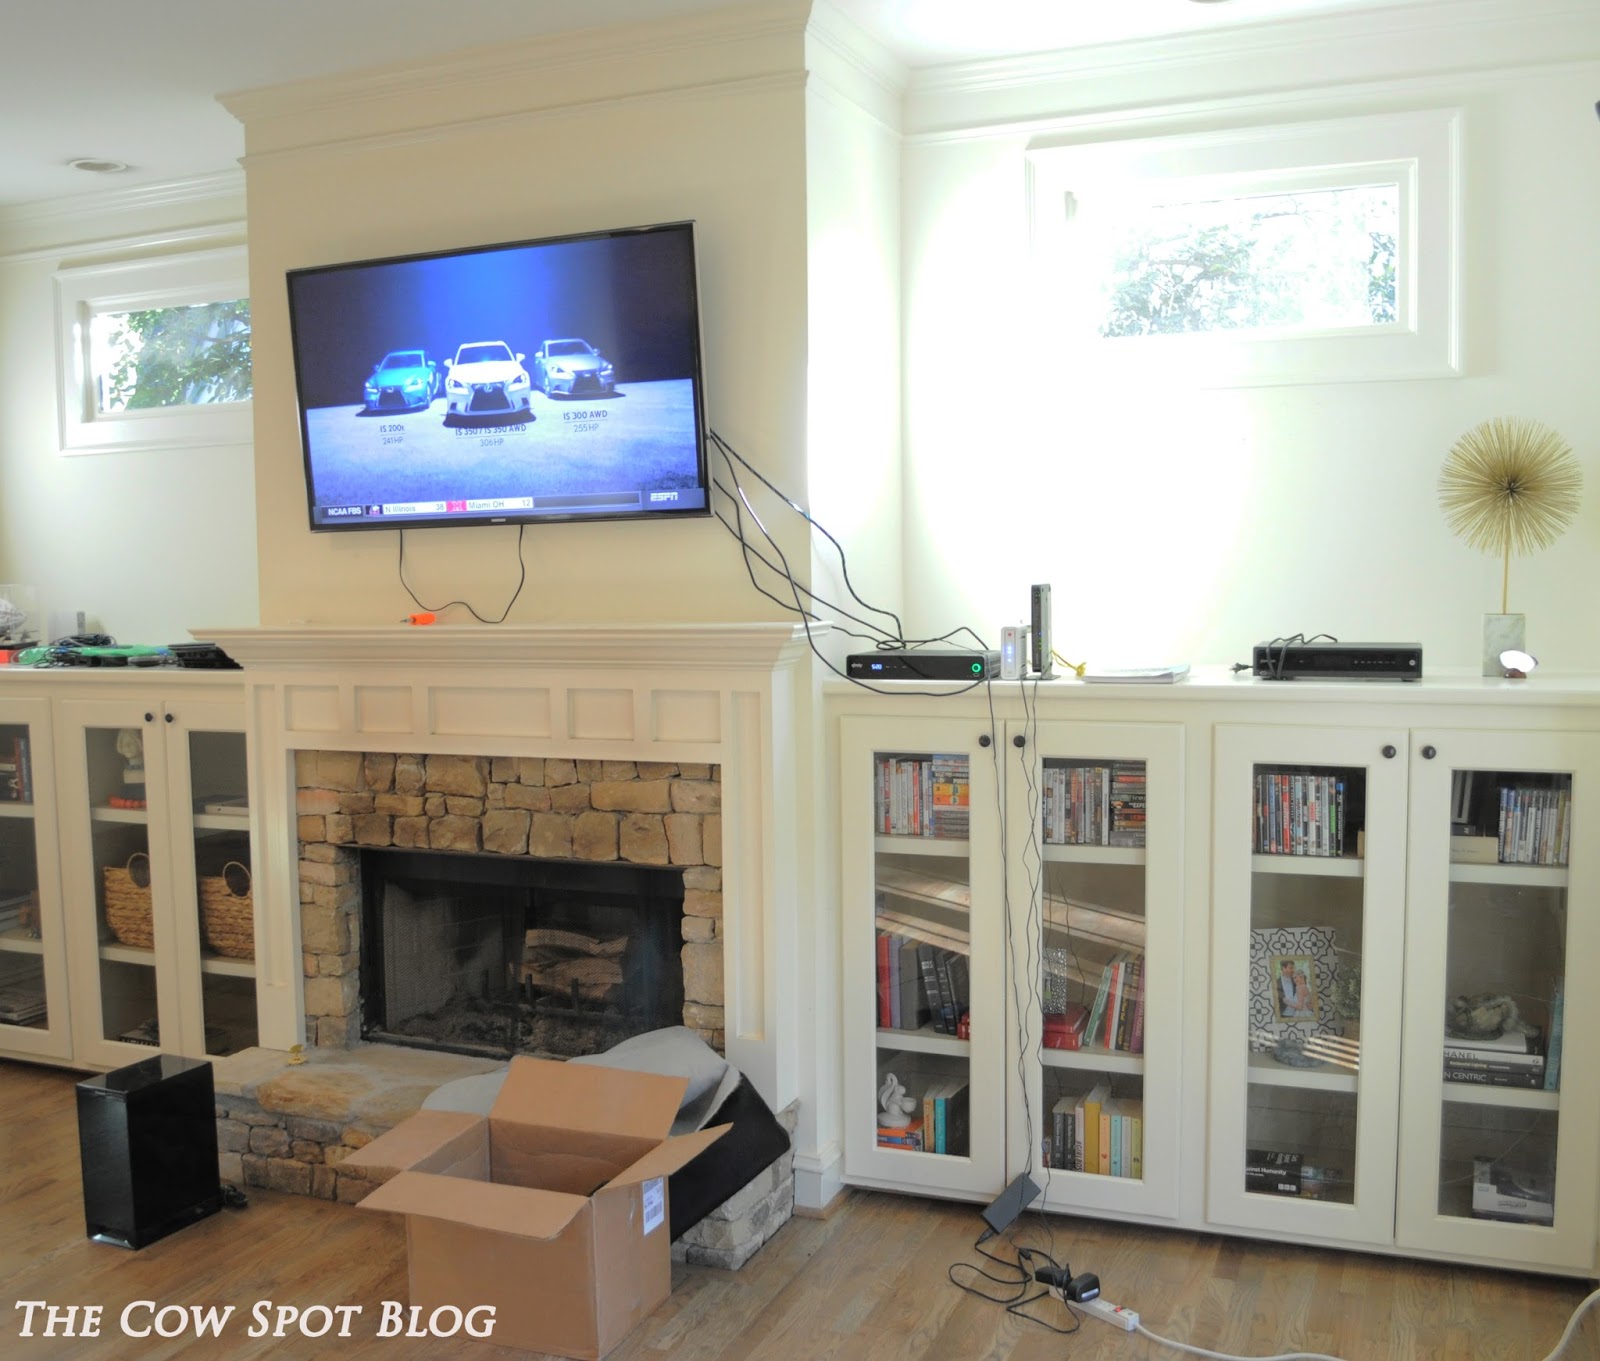
It was cord city over here! 

In our last house we put all of the TV "stuff" behind the fireplace which happened to be at the top of the stairs going down into our basement. However, as you can see we didn't have that option here. We had a fireplace on an exterior wall with flanking built-in cabinets that had GLASS DOORS. We knew something had to be done so Brent decided he was going to see if it was possible to create a niche on the side of the fireplace to store our goods. I'm not really sure how this project jumped to numero uno in the big scheme of our life at that time, but it did. 

Because it was literally moving day, family was in town helping us and before I knew it my brother-in-law Jimmy was hammering out a hole in my wall. 


Once they had a small hole Brent used his saw to cut out a bigger hole so they could take a look at what was going on behind the sheetrock. The hope was that there would be enough space behind the wall before the fireplace flew to insert a cabinet to hold all of our gear. Lucky for us...there was! 


Brent wasted no time pulling out the necessary tools and whipped us up a box to slide right into the space. 


Once he had the box in the hole he pulled all of the wires through and installed a new outlet to plug everything in to. 


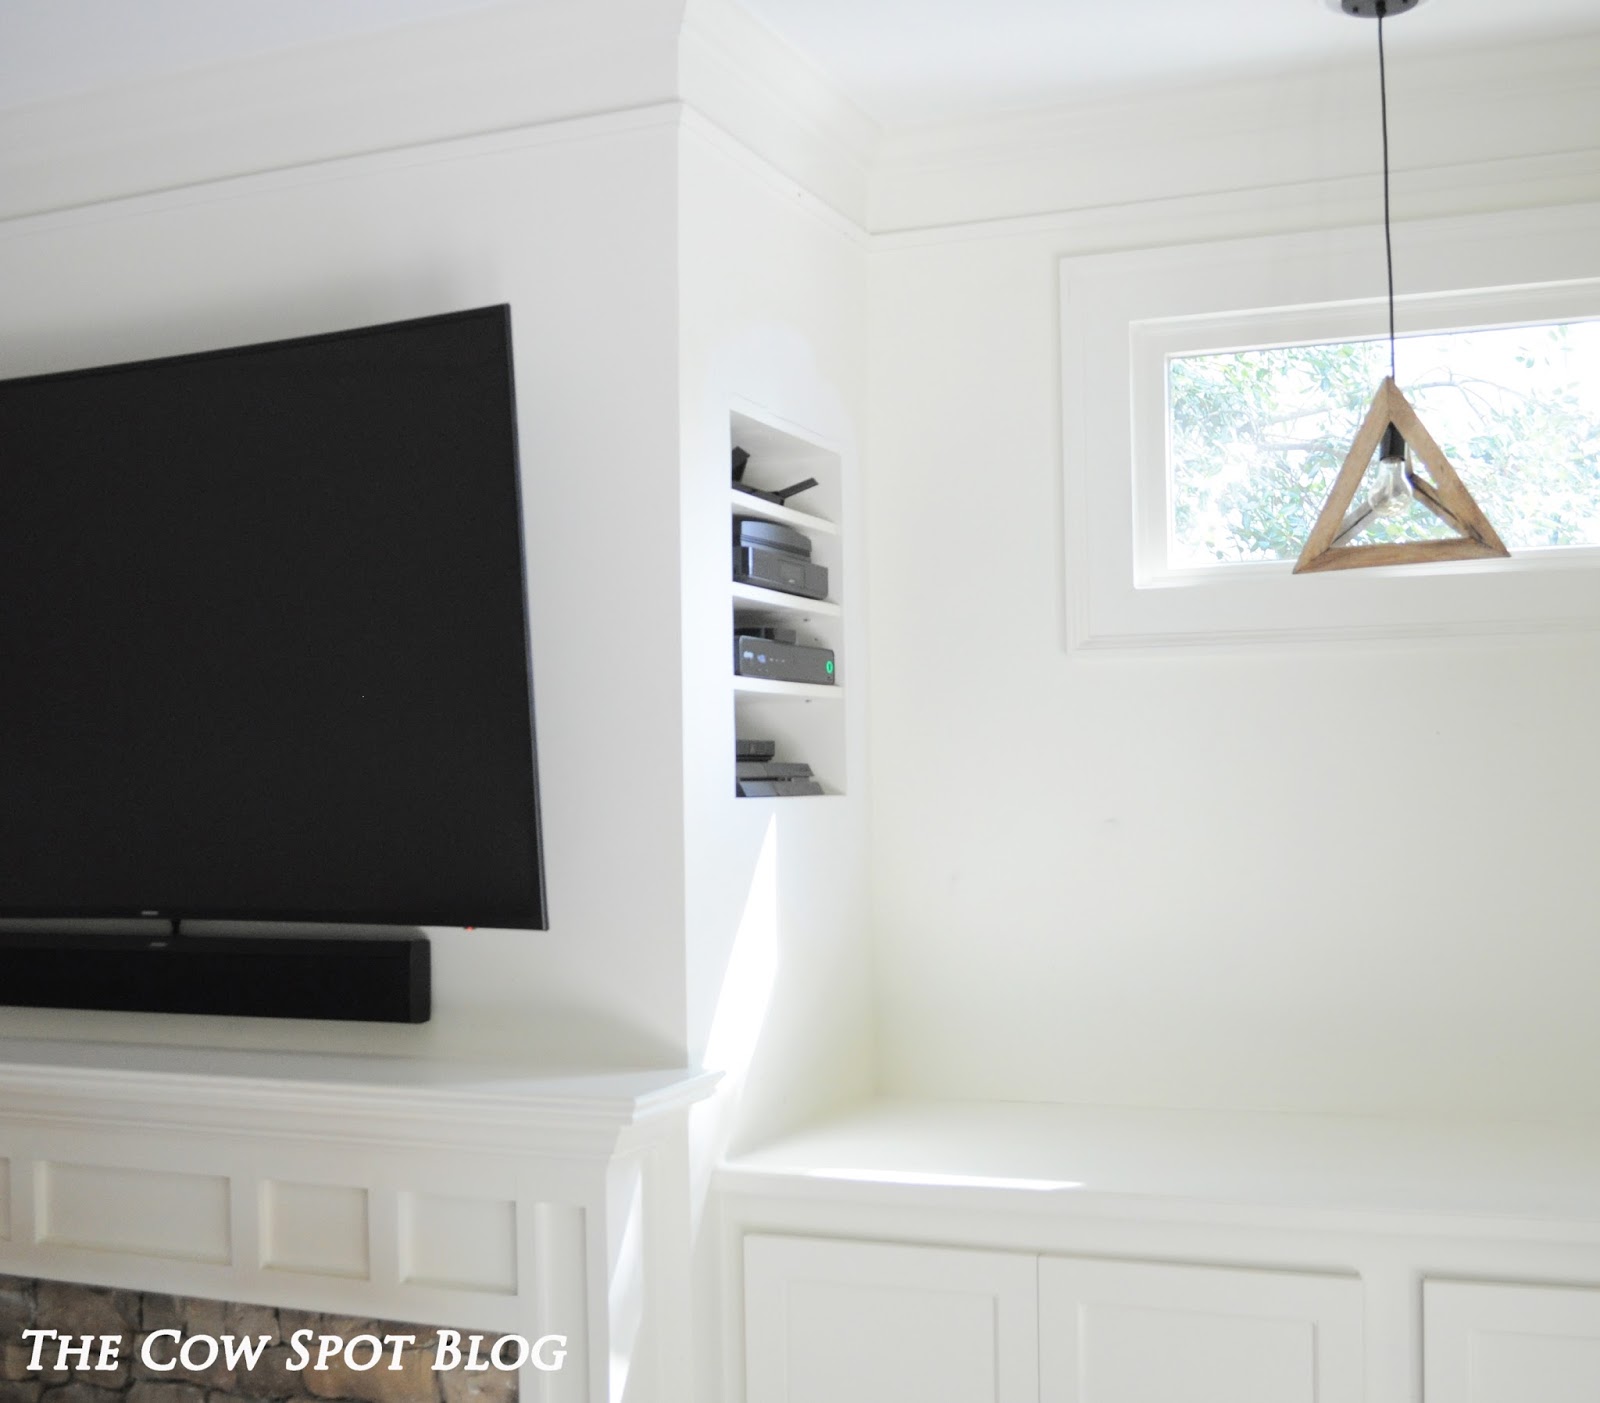
Next we installed some shelves, painted everything the same color as the walls and loaded our little niche 's with all of the TV, video game and Internet gear. 

It's not glamorous or groundbreaking but it made a HUGE difference in this room. You literally would never even know this niche was there unless you were entering from the back patio. Having a TV over a fireplace is not always ideal, but having a TV over your fireplace with cords dangling every which way is just...........terrible, visually speaking. Lucky for us, this little issue was an easy DIY fix that really got this room off to a good start! 

All photos are my own. 

Monday, August 29, 2016

Patio Project - LIGHTS!


I'm back with a little Patio Project Update....LIGHTS! 

Once the outdoor kitchen portion of the project was finished up we turned our attention to the lighting and electrical before starting the pizza oven. Lucky for us the fence goes around the entire Outdoor Kitchen area so we decided to utilize it as a wall and hang sconce lights + electrical outlets and switches from it. As we were deciding which lights, how many, where they should go, etc...we also discussed where the conduit should run. We knew there would be a fair amount of conduit going from the electrical box we had put in a few months ago, to each light, switch and outlet. We tossed around the idea of installing the conduit on the front of the fence and using metal tubing to give the whole space a more industrial vibe but ultimately decided to go with a cleaner look and install the conduit on the back of the fence for a sleeker aesthetic.

Here are the supplies, all from Home Depot. 


We started by placing each light, switch and outlet visually, by measuring and marking things out with a pencil. Next, we traced the  junction boxes and then Brent cut them out with his jigsaw.


We did this for the outlets and switches as well as for the sconce lights. 


Next, Brent ran the conduit along the back-side of the fence and snaked the wire through. This ended up being a beast of a task because some of the runs were so long, things started getting tangled inside the conduit. 


Next, we pulled the whips through each junction box and then got to hooking all of the wires up. 


We went round and round about which outdoor sconce light to go with but finally decided on these from Wayfair. Not only is the price really good, but we liked the simple lines and scale of these lights. 

And here they are in all of their glory:


There are 3 more lights on the other side, plus 2 more, one on each side of the doors leading back into the house. I would show you, butttt by the time we got all of the lights installed we had already started the pizza oven, so to show you the lights would mean you would also get a sneak peek of the pizza oven and I just can't let the pizza oven steal the new light's thunder like that. I know you understand. :) 

All photos are my own. 

Sunday, August 21, 2016

Dining Room Progress & A GOOOOOD DEAL!


I feel like we have been working on our Patio Project F O R E V E R and as excited as I am for that space to really be taking shape, I'm literally itching for some progress INSIDE. Thankfully last weekend we happened upon a great deal and made some unexpected progress in our dining room!

Soooo let's recap for a minute, since introducing you all to the new house we have made some decisions/changes to how we will use the spaces. The room that was dubbed the dining room when we purchased the house is actually going to be our home office and the room that was the formal living room is now the dining room. A formal living room is just not practical for our needs, but another eating area is something we can always use, especially when we entertain.  This room sits at the front of the house, gets great natural light and because it opens up to the foyer, feels really long and open.

A few months ago we had a dining room table made by a guy Brent found on Craigslist. We happened upon this craftsman by inquiring about the size of another table he had listed. When that table wasn't the size we were looking for he let us know he could make us a table whatever size we wanted. So, we got our thoughts together and sent over our vision. He literally made the table in his garage to our exact specifications and we are SO happy with it. I think we paid $600 and it took him about a week to complete. Thankfully Brent's brother Phillip was in town when the table was ready for pick-up, because it took all three brothers to carry that beast in the house.

For months this side of the room has been empty with the exception of the table, that is until last weekend when we fell into some seriously good luck.  On Sunday we popped over to Scott's Antique around 2:00. For those unfamiliar, Scott's Antique Show comes to town (Atlanta) the second weekend of every month. Vendors from across the country wheel in to town with all kinds of furniture, decorative pieces, rugs, art, etc...Anyways, because it was the last day of the show and late in the day at that, a lot of the vendors were packing up. We perused around and while we weren't looking for anything in particular, we always have a list of certain items we are in need of in our head, and this time that list consisted of:
  • Coffee table
  • Sofa table 
  • Dining Room Chairs
Randomly we came upon a booth that had a pair of really cool wing back chairs. We had long talked about the concept of having two nice, big chairs at the ends of the table, captain chairs if you will, with other chairs or a bench along each side. As we walked over to take a closer look we noticed the price tag said  $1200 dollars each...YIKES! We really loved the chairs...they are equal parts funky and classic and the blue color is literally our weakness. Brent and I are bad, we both love blue and if we don't watch ourselves we would have blue on every singe interior item we purchase! However, as much as we liked these chairs there was no way we were going to pay that price, but before we could walk away, one of the sales guys walked up and randomly told us he would sell us the chairs at $699 each. A better price, but still more than we were looking to spend on this particular trip.  We verbalized this and his response was "OK, how about $299 each? I really don't want to load them back on the truck." Umm.....We did love them and at that price, what could we do!? So, we pulled the trigger and took the chairs home.

And here they sit.


And happy we are. 

Oh, and the best part? This same chair retails for $1,650 (on sale for $1,237) at Restoration Hardware. GO US!!!!!!!!!!

Unless otherwise noted all images are my own. 

Tuesday, July 19, 2016

Patio Project - Part 4

I'm back with a big ol' update on our Patio Project. July has been a busy month for us, so we haven't had a lot of full weekends to dedicate to the beast that is this little DIY of ours, instead we have worked on it here and there, which somehow turned into some pretty big progress.  

::::INSERT 10,000 HIGH FIVES:::::

Let's dig in...

With the tops in place we were ready to finish up the cabinetry. We had used cedar wood for our last outdoor kitchen and we were happy with the way it held up to the elements, so we decided to go that route again. As for the stain we wanted to go with a warm brown tone this time around so we settled on Varathane's Early American


I stained all of the planks and Brent focused on cutting them to fit and then installing them on the face of the framing. 


 While Brent was busy measuring, cutting and installing the planks I finished up painting that dang fence. The two-toned, half brown, half taupe scenario was literally hurting my eyes. 


Once the planking on the grill wall was complete, it was time to add our doors. If you followed along with our last outdoor kitchen, you know we made the one door in that kitchen ourselves. Like the rest of the kitchen that door was made of cedar wood. We liked the look, but over time that door had issues staying square within the hole. In general wood is not the best option when it comes to the outdoors. Cedar and Cypress are the best woods to use if you go the wood route, but even they will swell, crack and ultimately fail over time. So, this time we decided to go with metal doors. We found these doors on Amazon and are really happy with the fit and aesthetic.

We picked out the doors way back when we were working on the framing, so Brent was able to plan the framing accordingly. Once the planking was up we unboxed the doors and put them in place. 

Next, we got started installing brick on the face of the fireplace. We started with the opening...


And then layered on the pavers piece by piece along the entire front. 


Once the brick was all up we let the mortar dry for a week and then I went to town painting the brick. 


With the fireplace front painted Brent could install the planking on the wings to the left and right of the brick. He also framed in and planked the opening on the far right which will hold the firewood. 


And with that I think we can say the outdoor kitchen   portion of this patio project is COMPLETE! Next up...lights and the pizza oven.. Eeek! 


All photos are my own. 

Tuesday, June 28, 2016

6 Months of Croix & a Little Beauty & the Beast


Like a lot of people, I listen to music when I run. Unlike a lot of people, my playlist of choice on Pandora lately has been Disney. Random I know, but there is something about Disney tunes that make sweating your brains out a little bit more enjoyable. I like to zone out when listening to music and let songs kind of lead my thoughts. A few months ago, shortly after I was cleared to start exercising again after having Croix, I heard a song that I thought described mine and Brent's journey of parenthood perfectly.

Disney + parenthood = weird I know, but honestly every single time I've heard this song I think the same thing. So, today in honor of Croix turning 6 months old yesterday I thought I would share what runs through my mind as I literally run and listen to this song.

The song.....

Beauty & The Beast. 

Tale as old as time


True as it can be

Croix, minutes old....
Barely even friends

Croix, 1 day old. He had a little jaundice and had to wear the glow worm suit. 
Then somebody bends
Unexpectedly

Watching the Super Bowl and enjoying one of Croix's first smiles. 
Just a little change
Photo by Zack Moye Photography
Small to say the least

Both a little scared


Neither one prepared

Beauty and the Beast


Ever just the same

First Mexican food meal as a family of three. Croix was 5 days old and slept through the whole dinner.
Ever a surprise


Ever as before

Croix snoozing in front of my Kitchen Design.
Ever just as sure
Croix's first time in a pool!
As the sun will rise
Croix.....5 months and 30 days old. 


It's hard to believe we have known this little person for 6 whole months. Before Croix, I would hear this song and think....love song. Now, when I hear this song, I still think love song, just a whole different kind of love song. Happy Half Birthday Croix!

Unless otherwise noted all photos are my own. 

Thursday, June 23, 2016

Spotted - Atlanta Homes & Lifestyles Magazine July 2016


Today, June 23rd, marks my 8th anniversary as a Kitchen & Bath Designer!  EIGHT YEARS....that is college twice (or one and a half for some....:) ) How crazy is that?

In other news.....I'm pumped to have a kitchen I designed featured in the July issue of Atlanta Homes & Lifestyles Magazine!


Do you guys remember the Luxury Living Show kitchen? The kitchen that sat in the middle of the mall (Phipps Plaza)? The one that started out as this sketch......
Well, if you didn't get to see this kitchen while it was on display in March, here is your chance to check it out. 


Cabinetry: Bell Kitchen & Bath Studios (color Benjamin Moore Stone Hearth BM984) | Styling:  Melanie David Design | Countertops: Cambria (Ella) by Construction Resources | Barstools: Serena & Lily | Appliances: Sub-Zero/Wolf | Sink/Faucet: Franke | Internal Drawer Components: Richelieu | Hardware: Top Knobs

All photos are from Atlanta Homes & Lifestyles Website.