Friday, June 22, 2012

Happy 4.

Tomorrow is a big day for me! June 23rd marks my 4 year anniversary as a Kitchen & Bath Designer.  Wow, time sure does fly when you're having fun ;). 

When I get over the fact that being four years into my career puts me 8 years out of high school, aka I'm getting O L  D (ahhhh), I'm pretty pumped. As I mentioned in my very first blog post, in an industry where some have over 30 years experience you claim every ounce of the experience you have, so adding one more year to my repertoire is exciting.

What you will read next may look something like me tooting my own horn. I apologize in advance, but I figure if you're reading this you like me enough to care and maybe even toot along with me.

As I reflect over the past year I'm reminded of what a big year it's been;  full of changes, excitement and new endeavors.  At the beginning of my 4th year I changed companies and now work with Inspirations Kitchen & Bath Studio. I love it there. I feel so lucky that I can honestly say I love what I do, and I love the company I work for. It makes work seem less like, well work.

Right after my job switch I won my first  design award, the 2011 Calla Award for Large Kitchen. To say I was excited would be an understatement. As much as I love what I do, there's something so fulfilling about having your work recognized.

Here I am at the Calla Awards with my good friend Courtney Rogers, it's her 4 year anniversary too! We graduated together, started on the same day at our first job and both won a 2011 Calla Award. BIG MOMENT!

And finally, I started this blog, which has become one of my favorite past times. I love this blog, and I have a lot of fun writing, researching and working on the posts each week. For me, it's been a great outlet to keep me inspired and in the know as well as an opportunity to share my experiences with all of you. It's one of the best decisions I've made, and truly something I look forward to weekly.

Too add icing to my blog-love-cake, early this year I was nominated and a FINALIST for the "Best New Design Blog" category for the Design-Blogger's Hall of Fame! I had no idea, and was so excited/honored/surprised when I found out.


With added years of experience comes added knowledge. And the experiences I've had a long the way, good and bad continue to make me sharper, more relatable and ultimately more useful to my clients. I'm looking forward to year 5, and I have some pretty high goals set for myself. Get ready world, here comes Courtney Foster, Kitchen & Bath Designer Extraordinaire, round 5! GO!

Monday, June 18, 2012

Against the Grain No More

As we've talked about several times in the short life of this blog, interior styles and trends truly do seem to come full circle. And, as these trends make their second circle debut, we, as designers and homeowners, wise up and learn how to work with these trends and not against them. So far we've talked about white cabinetry, brass and now we will discuss oak. Until recently, I thought of oak as a ho hum option. While some clients liked the look of oak cabinetry, it has never really interested me. Granted, most of the oak kitchens I have come across look something like this:

Oak cabinetry surrounded by blah countertops, blah flooring, blah appliances and blah backsplash. This look is a hot, outdated MESS!
To most (I was guilty of this mindset too), oak is more a color than a wood species. When people think of oak they think of honey stained cabinets similar to those shown above, that were popular in the 70's and 80's. For years we have been gutting and replacing oak kitchens, because people wanted a more updated look. Wood species such as, cherry, maple, mahogany, painted maple and walnut have been among some of the more popular choices in the last decade. However, oak has recently resurfaced and is actually giving some of these other wood species a run for their money.

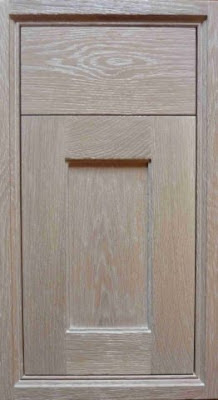
As a species, oak has an open grain that takes stain well. The graining is busier than maple, and often has a bit of a '3d' effect that shows though paint. The difference between the oak from the past and the oak we are seeing today is all in the cut. There are several different cuts that can be performed on oak:  plain sawn, quarter sawn and rift sawn, all producing different aesthetic results.

Plain Sawn Oak:

This is the method of cutting we are most familiar with, it is the method used on the cabinets shown above. Plain sawn oak is the most straightforward way to cut rectangular boards from a round log. A series of parallel cuts are made, creating large grain patterns and inconsistency.


The benefit in going in this directions is it's less expensive, because there is less waste created. This look can really work with the right stain/paint color. The graining gives the cabinet depth and interest beyond the color of the wood.


Quarter Sawn Oak:

This method of cutting requires the log to first be cut into quarters and then sets of parallel cuts are performed perpendicular to the trees rings.


Quarter sawn oak has a tighter and more consistent grain pattern. This type of cut is more expensive than plain sawn oak because the yield is not as substantial so more waste is left behind.


Rift Sawn Oak:

This process starts by slicing the veneer at a 15 degree angle to the radius of the log. This produces straight, striped grain appearance. This method yields the least amount of veneer than any other method and is the most expensive.

I couldn't find a rift sawn diagram but the photo above does a great job of comparing the three techniques.


Isn't this beautiful. I love the graining and the color. So sleek and warm.
The photo above showcases rift sawn oak with a horizontal grain. A matching horizontal grain in both quarter sawn and rift sawn oak can significantly add to the price of the cabinetry.The pieces selected to make each door have to be book ends so the grain picks up where it left off from cabinet to cabinet. If at any point a cabinet door should get damaged, successfully replacing a door and having it match is slim to none, therefore all cabinet door fronts would need to be replaced on this run of cabinetry. Expensive. Headache.

I started researching oak cabinetry because I've had several clients interested in going in this direction. The more I dug the more amazed I became that different cutting methods can affect the look of lumber cut from the same tree. My new found knowledge regarding oak is thrilling and embarrassing at the same time. How quickly we discredit something we know so little about, only because it was done poorly in the past. Let's get real, it seems like everything looks better the second time around. Once we open our minds, we can learn from the mistakes of the past and work with the properties of materials instead of against them.

All photos are from google.

Sunday, June 10, 2012

A Tanned Cow Spot

I'm back from an amazing week in Jamaica! Feeling tanned, relaxed and happy. There's something about white sandy beaches, clear skies and blue water that is good for the soul. Now, the swim up bar, water lounges and 24/7 at your service attitude doesn't hurt either ;)


During my vacation I planned to totally relax and leave all thoughts of work at home, but somehow thoughts of design followed me. As I enjoyed the views around me I began to see correlations between the beauty that is the beaches of Jamaica and design trends. It occurred to me that God was the original and most skilled designer. Teaching us by example, all the rules and fundamentals that make great spaces. His work can be seen everywhere, but it's hard to miss these examples when you're spending day after day in paradise.


Aren't the colors above beautiful? All the blues, greens, tans and whites, they are cool and warm all at the same time. Interestingly, variations of the colors you see above are quite popular in design right now. As people consider design schemes for their rooms most are looking for colors and textures that inspire relaxation and tranquility.


I was also quite taken with the driftwood on the beach. If I could of packed one of those suckers in my suitcase I would have. How sweet would a piece like the one above look on a dining room table, or on the floor in front of the fireplace. Oh the things I could do with a chunky piece of Jamaican driftwood....


Playing with various textures is very important in design and we could all take a few notes from the natural mixture of textures seen at the beach. Regardless of what beach you are on, there are different textures everywhere you look. The best part is that the textures change hour by hour.  The sky, the clouds, the ocean waters and waves, dry sand, wet sand, glistening sun, driftwood, rocks, plants and shells all come together to create the beautiful views we all enjoy.

Photo by Jordan Foster.
Well, as my tanned fingers type this blog post I'm mentally preparing for my return to the real world tomorrow. And I'm happy to report that I'm excited, as much as I enjoy a break every now and then it's always nice to be back in action!

Saturday, June 2, 2012

It's All About The Process

3 day weekends = 4 day work weeks = Ahhhh!!!

Four day work weeks are always fast paced, but add to it the fact that I leave on Sunday for a week in Jamaica.... and this week has been uber super duper oh my gosh I need a drink/massage/nap crazy!

Amongst other things that have been going on this week, I have a big job that started installation yesterday!  I'm excited to watch as this project comes to life, as it has been a fun job for me to work on. This is one of those projects with a lot of depth. Hours of thought, consideration and tweaking have gone into this project as we (myself and the homeowner) have striven to make these cabinets more than just boxes, but functional aesthetic anchors to the space.

This is a new construction project and the homeowner came to me at the end of last year interested in Inspirations Kitchen & Bath Studio doing the cabinetry for the kitchen and the master bath. As we worked on these spaces we eventually were given the opportunity to provide cabinetry for the laundry room, mudroom/desk area, children's baths and all secondary bathrooms. The best part about this project is that every room is different, and the decisions made regarding the design, wood species, cabinet finishes, hardware selections and door styles were not made lightly.  Thankfully, we came upon each of these decisions one at a time so as to avoid making the process overwhelming.

Here's a glimpse into the process of creating beautiful rooms with beautiful cabinetry.

Designs usually start like this - graph paper sketches. Drawings like these are conceptual and a starting point to build on.
From my sketches come 2-dimensional and 3-dimensional drawings. For this project we went through several versions of the designs as we tweaked here and there, really thinking about how the space would be used. We moved several key pieces, specifically the microwave and prep sink a few times until we settled on the location we felt would work the best.

Here is one of the kitchen perspectives. As you can see, it's as if you are in the space, and really gives the client the opportunity to get a feel for what the space will really look like.

Once the design layouts have been confirmed, we start looking at door styles and finishes. This is where the space really starts to get it's personality!


Here is our door gallery.


As I mentioned above, we used several different door styles and finishes for the cabinetry in this home.  Interestingly despite the plethora of door styles we have to look through, we came upon the decisions for the various door styles fairly quickly. It was the finishes that took some time and consideration.


These are just some of the finish samples we have to look through.

All of the rooms have painted cabinetry except for the kitchen and powder room, which are stained. The stained finishes for both spaces were fairly easy decisions, it was the paints that took some time to select. Because Bell Cabinetry is custom, you can pick any color out there and we can match it!

And I mean literally ANY color..............
And finally it's time to choose the cabinet jewelry aka the hardware. This process is very important and requires attention to scale. We go through every room and choose the pieces of hardware that would work best given the decisions we've already made - design, door style and finish. 


Once we have chosen the specific pieces of hardware for each room, I draw the hardware on the cabinet elevations to acquire the hardware count as well as get a visual on what the hardware will look like on each and every door and drawer front. I love, love, love the hardware selections for this project. We are still buttoning up some final decisions but we are tossing around using some really cool pieces!

This may seem like a lot of decisions and detail, and it is. But, these are the elements that make a space unique. And believe it or not, there are even MORE decisions and details that I'm not including - think drawer organizers, spice pullouts, trash/recycling, roll outs, tray dividers, appliance lifts, etc...Yeah, it's a lot, but it's fun. And at the end of the day when you are living in the space that you have poured so much thought into, you will be happy and forever thankful for the time you spent fine tuning these decisions. I know this will be the case for this client.

Confession: As I write this blog, I don't hope my client will be happy, I already know she is. She called me this yesterday, very excited (best calls ever) about the cabinets that had been installed so far (kitchen & laundry)!! I can't wait to see for myself this afternoon!

Here are the cabinets all packed up on Thursday, ready to go! Stay tuned, finished shots coming soon!

All photographs included in this post are my own.