Showing posts with label Nursery. Show all posts

Tuesday, July 11, 2017

Gates Nursery Reveal


On June 8th our family welcomed it's newest member - Gates!

I'm so excited to be an Aunt and I'm even more excited that Croix and Gates are so close together in age. Cousins are THE BEST and I love that they will get to grow up together.

Today I want to show you all his nursery. Let me start by saying I had literally zero to do with this space. My sister, Candace, who could totally be an interior designer herself, (hello, remember her home office?) + her husband Jimmy get all the credit here, I just love how happy it is. Plus, I know spaces like this only make the world a better place, visually at least ;) and need to be shared.

Ok, let me show you around.....


They bought a new house earlier this year and got started on the nursery right away by having the walls painted Shoreline by Benjamin Moore. They wanted a crisp and clean color to act as the backdrop for all the pops of fun decor and furniture. 

Speaking of fun decor.....umm..... H E L L O adorable little friends....


On the other side of the room sits the changing table with a closet full of teeny tiny little boy clothes beyond. I love how they elevated the look of the Ikea dresser with some new cool brass hardware! 


One of my favorite elements in the room are the framed words to the song "Little Boy Blue" flanking each side of the window that Candace had commissioned from Journey Joyful on Etsy. Our Grandma used to sing that song to us all when we were little and I think it was so sweet to bring a piece of her (Gates' namesake!) into this space. 


Pretty stinking' happy right?!  I'd totally lay here, all wrapped up in my swaddle like a burrito, enjoying the sites.  Gates is definitely a lucky little guy! Plus, it's cool to think it won't be long until Gates is crawling on that cute rug and reading stories with his Mom and Dad in the rocker and likely ripping all the beautifully styled items off that bookshelf (Croix will teach him that part :) )

All photos are my own. 

Wednesday, December 16, 2015

Nursery Reveal


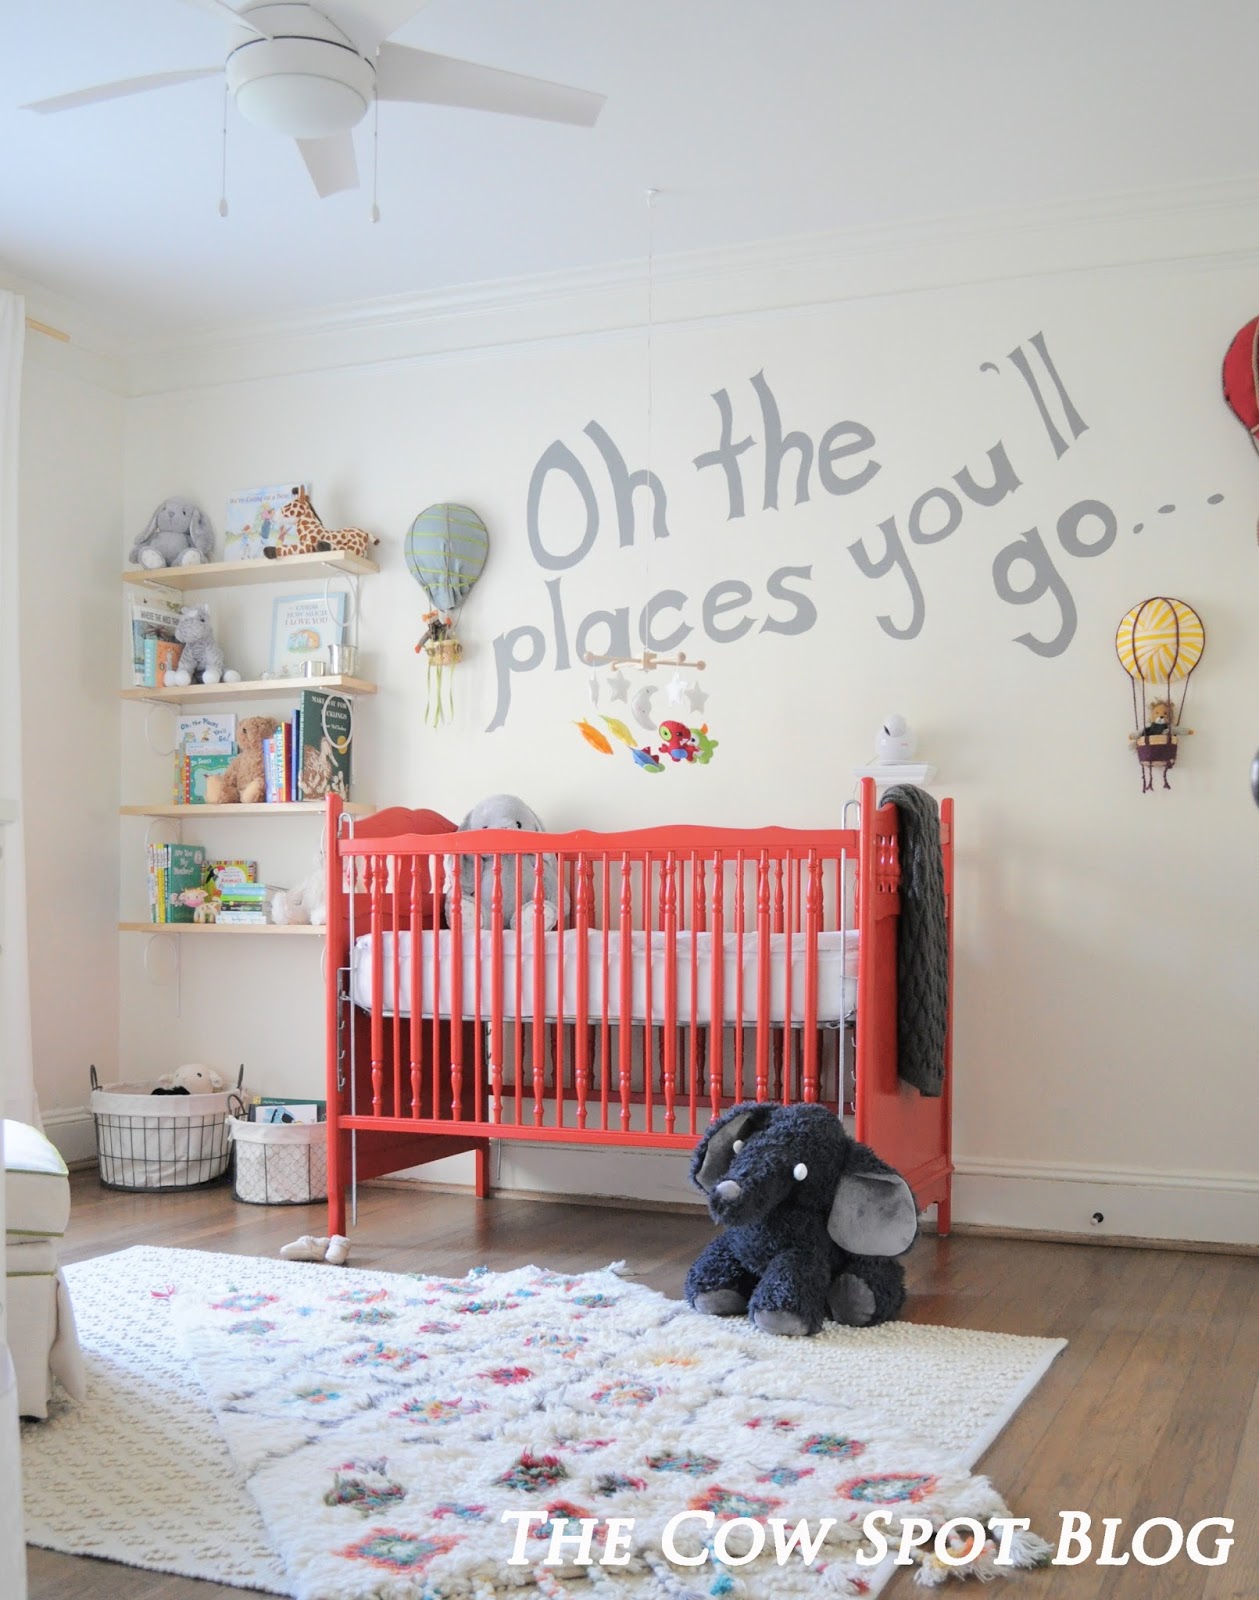
It is absolutely blowing my mind that Brent and I are weeks, days or maybe even hours away from welcoming our baby into the world. OUR BABY.....what?!? It is so crazy and exciting! Luckily some time over the past 5 weeks, since moving into our new house, we got the baby's room put together and I am so excited to show it to you today.


We don't know if we are having a boy or a girl, so our main goal for this space was to create a bright, colorful and happy room suitable for any child, or grown up for that matter. The red crib was our jumping off point and from there we really just layered on the happy. 


Brent free-handed the wording on the wall with a pencil and then went back and painted it; he has skills coming out his ears, I swear. And those hot air balloons...we made them! Can't wait to show you our DIY tutorial on those soon. 

The room gets great natural light, making the mornings some of the prettiest times to be in this space. We kept the curtains super simple so as not to fight some of the other louder pieces in the room. 


One of my favorite spots in the room is the bookshelf. We bought those fun brackets and shelves at IKEA and loaded them up with all of the books we received at our showers. The stuffed animals you see were center pieces on the tables at our first shower and look so cute sprinkled amongst the books. 


Over on the other side of the room... 


We kept things simple on this wall with the changing table and glider, both of which we customized. We added those aqua feet to the changing table which not only give it some pizazz, but it made the piece higher overall which we hear is a plus for taller people to change diapers with ease. Hey, just trying to make any and everyone who might be willing to help me change diapers' life a little easier. I'm a giver like that..;) My Grandmother & PapaJack gave us the glider as a baby gift and we were able to pick the fabric and piping. I love how the lime green piping pops off the cream fabric. OH, and the icing on the cake? It is THE most comfortable chair I have ever sat in, which is probably very much ideal seeing as how I will likely be utilizing it a lot. I hear babies like to be held and fed and rocked, all of which I can do from this big, beast of a chair. 


And because it is Christmas, we set up the cutest nativity scene on the side table. This was a gift from my Aunt Kathy and we were so excited to add a little Christmas cheer to our born-around-but-hopefully-not-on-Christmas baby's room! 

Well, there you have it. Baby Shearer's nursery. WE HAVE A NURSERY! WE ARE HAVING A BABY!! Somebody pinch me.....


All photos are my own.

Monday, October 12, 2015

Red Red....Crib


I can not believe I am officially 7 months pregnant. SEVEN MONTHS! In all seriousness this pregnancy has been pretty dang easy. I really have no complaints other than the fact that it's going by really fast and I pretty much feel behind 24/7. But you know one thing we are on top of? 
The Crib. 
Back in August I mentioned we were tossing around the idea of using the crib Brent and his brothers used when they were babies which also happens to be the crib their mom, Cindy, used when she was a baby. Bottom line...the crib is no spring chicken. Old is great in interiors, in fact sometimes I prefer it, however when it comes to babies, old can actually be dangerous. There are several features prevalent in older cribs that have been known to hurt babies, the two main concerns are:
  1. The distance between crib slats and spindles should not be too wide. The minimum size is 2 3/8" wide. Anything larger than this poses the risk of the baby slipping through completely or the torso slipping through which would trap the babies head. 
  2. The drop-side. The ability to drop the crib is convenient but over time the hardware can give way and a gap can form between the mattress and the drop side creating a dangerous area where babies can become trapped and suffocate. 
So, we set out to DIY some fixes to these concerns and give this crib a fun new life for our little mini. 

Here is a shot of the crib before 

To solve the issue of the spindles being spaced too far apart we purchased wooden dowels at Home Depot to place in between each spindle. Not only would this bridge the gap, but I was excited for the aesthetic interest it would add to the crib. 


Brent cut each dowel to the correct height and then drilled holes and slipped the dowels into place. 

With the new dowels installed we drug all four sides of the crib to the back yard to paint. 


As for the color we talked about several options but I had one color on the brain...RED. I know, it's a little random for a baby room, but I love the color red, it's happy and bright and just seemed like the perfect choice for this room. Especially considering it could work for a boy or a girl. Our red of choice? Stiletto Love by Behr.

To tackle this paint job we enlisted our favorite tool - the paint gun! 


It is amazing how much quicker the whole painting process goes with this gun. In a matter of minutes one whole panel was evenly sprayed. Brent sprayed one coat, let it dry an then flipped the pieces over to spray the other side. 


Once each side had dried Brent created a little homemade rig to hold the pieces vertically so he could easily get all of the sides, nooks and crevices. 


Meanwhile I was busy tending to the metal pieces. The crib came with a metal vertical rail for the drop part of the crib to slide up and down. While we planned to nix the ability to actually move the sides up and down we wanted to keep the metal rail for the cool factor. So I sprayed the metal rails, all hardware and the metal spring that the mattress will sit on in this bright silver paint. 


We hung fishing line between the deck and a tree for the metal pieces to hang on for easy access and full coverage as I sprayed them. In our experience this is the best approach for spray paint - less runs, even coverage and faster drying.


Once everything was painted we left the crib and it's parts outside to bake in the sun for a few hours to get nice and dry. Later that night we brought everything back inside and Brent began assembling.

To solve the issue of the drop sides we drilled the side walls of the crib into the head and foot boards to ensure the sides would not move. 

And finally.....


Here's a close up shot of the metal detailing along with the added dowels. 


Pretty dramatic transformation, eh? We love how the crib turned out and can't wait to add the bedding and other finishing touches. Speaking of finishing touches, we had our first baby shower Saturday! It was so much fun and we got so many cute, adorable, useful, awesome, practical and fun things!  It kills me how the cuteness factor of basic things like say, a sock,  is literally amplified by about 200% when seen in miniature form. CUTENESS OVERLOAD OVER HERE and there isn't even a baby roaming around yet.

All photos are my own.