
Furnishing our home has been a slow process. We have really been trying to think through each and every decision before making big commitments, and as hard as it is, we are really trying not to buy things just to fill the space. It's a challenge, because every day you walk into your house and you yearn for certain rooms, especially those you spend a lot of time in to feel finished. When I feel that itch to go buy, buy, buy I remind myself that the warmest and most intriguing spaces are those furnished with items and pieces that have been collected over time with a story and soul of their own. So, instead of making impulse purchases we make mental notes of items we are looking for and then wait for them to come to us.
One item we had been after for sometime was a console table to fill the wall space to right of the entrance into the solarium from the living room. This is the wall you see as soon as you walk through the front door, so picking the right piece was essential. We had some criteria for our perfect console - we envisioned a table with open shelving perfect for housing books, knick-knacks and baskets. Because this piece would sit on the same wall as the large Barmoire, we wanted it to be shorter with plenty of wall space above for art.
We kept our eyes open for the perfect table for months and seriously considered a few options, but ultimately the contenders we found were lacking in one way or another. Then, one day we came across a picture on pinterest of a table made of plumbing pipe and wood. The wheels started turning and we realized we could make the table ourselves and customize it to incorporate all of our wants.
So, we headed to our home-away-from-home, Home Depot, to peruse their selection of metal piping.

We wanted the table to be 46" wide x 36" high so we bought an 8' piece of metal, which the nice guys at Home Depot cut and thread into (4) 18" pieces for us.

We also picked up (10) 12" pre-cut pieces to form the top shelf and the cross bars. Finally we topped off our basket with wall mounts, T joints, elbow joints and other miscellaneous metal pipe to create all the feet and fittings.

Once home we started putting all of the parts and pieces together.

We screwed 3" pieces into the wall mounts (the technical term would be a base flange) to create the feet.

Next we connected T joints and used 18" pieces to create the space between the first and second shelves, using 12" pipe to create crossbars where the wooden shelves would sit. We repeated the process for the next level using 12" pipe rather than 18".

Once the metal structures were assembled, we spray painted them black.

While the metal portion dried, we went to work creating our shelves. Using a 2" x 12" x 12' plank, Brent cut (3) 46" pieces with his miter saw to form the individual shelves.

Next it was time to stain the shelves. We chose the Rust-Oleum's Varathane finish - "Ash".
Brent applied the stain....
Brent applied the stain....

and then wiped it dry....

Once all of the various components were dry it was time to install!
Brent screwed brackets into each shelf to hold it in place.

And then he mounted the piece to the wall.

Success!! We hung some art on the wall and accessorized the shelves.....

And just like that our console table dreams came true... (yes that is a hand guitar mount we found...LOVE!)
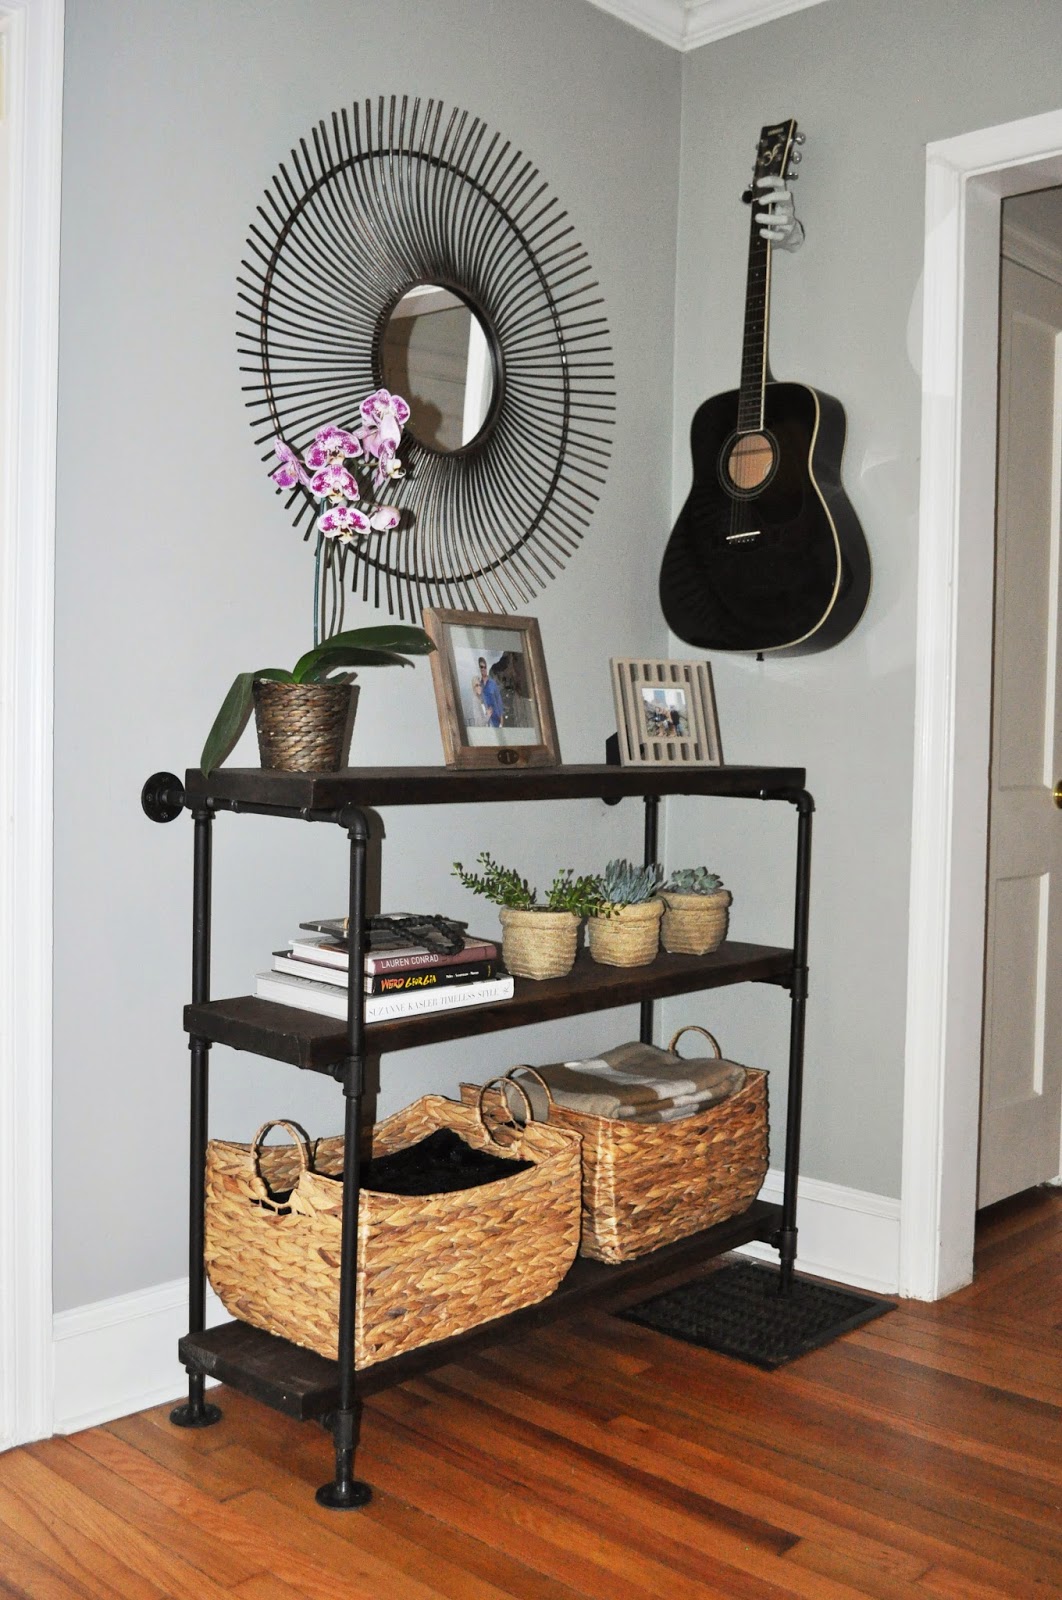
I love all the extra storage space this little guy offers. We have this large block sub-woofer that was sitting on the floor in this location since we moved in...attractive, I know. I was bound and determined to find a basket that would hide that little devil so it didn't mess up our aesthetics. Luckily, I was able to find the perfect baskets to house not only the sub-woofer but also blankets, magazines and miscellaneous Playstation gear.

Seeing this project completed is so satisfying. Not only does the piece look great and possess all of the features we were looking for, but it was pretty darn easy to make and much more affordable than a lot of the console tables we found online or at stores. The all-in cost of materials was less than $100!!! And if you want to take on a similar project but don't have a miter saw, Home Depot can cut the wood for you!
The living room feels SO much more finished now that this wall is filled and I love that we were able to fulfill a need for our home and create a fun piece without sacrificing aesthetic, function or budget. Three birds, one stone - DONE!
All photos are my own.


12 Appreciated Comments :
I just love it... and I think it looks awesome.
Wish we had the creativity you guys do!!!
You need to sell these, as I would totally buy one ;)
Going to share your post now...
love this- it came out great!!
Thanks so much Noelle & Stephanie!
Love it!! How much did the project cost? I want to do this in an 8' length for my dining room
Hey Heather, all in we spent about $100. Super affordable! Good luck on your project!
This is a pretty creative console table. It looks quite authentic and exquisite. And making one is actually cheaper than buying one. That way, you have free reign on how big or small you want it to be. Thank you for sharing this lovely DIY with us, Courtney. All the best!
Rosemary Bailey @ WabiCorpCa
Thanks Rosemary! We are super happy with it, having the freedom to customize really made a huge difference for our space.
Wow, that console table looks awesome. If I saw it without knowing that it was a DIY, I would probably ask you which furniture store you bought it from. Haha! Anyway, it looks like it requires a lot of work, but getting that amazing result makes up for all the effort you put into it. Thanks for sharing this, Courtney. Have a great day!
Bernice Parsons @ Badger Anodising
Love the console. Such a creative idea. Could you please list the materials when you get a chance? I am going to give this console table a try.
Thanks!
I agree! Furnishing our home takes time and effort, as it may take a lot of planning before you come up with an excellent plan. Well, it seems that this console table would come very handy to you! It looked so durable and strong enough to carry your stuff to be placed in there too. Thanks for sharing about this, Courtney! Good luck on furnishing your house!
Arthur Greene @ Central MM
Any chance you have an exact shopping list somewhere for this project?? :)
Post a Comment