
Genius ideas are fabulous, especially when they actually work. Mid closet rod upgrade I had a thought that I instantly believed could improve life as I knew it and take this closet of ours from good to great. The idea? Hold on to your seats....A sliding full length mirror. Think full-on Beauty & the Beast sliding ladder style.
The idea manifested from pure need. Would you believe we've gone over a year without a full length mirror in this house? Here I am a girl that very much considers every aspect of an outfit - and for one whole year in order for me to see my outfit in it's entirety each morning I had to stand atop the toilet. You can imagine how glamorous I felt...We've been on the hunt for a full length mirror for a while, but didn't know where we would put it. All walls are occupied in our master bedroom and while we could integrate one into the master bath, there was no clear cut place in there either.
It wasn't until we were smack dab in the middle of our closet rod upgrade that it occurred to me that we could install one more piece of plumbing pipe the full length of the closet and then hang a mirror from the pipe that would slide from side to side. Told ya - genius....

Pretty snazzy, right? But wait, the other thing about ideas, especially genius ones, is you have to be able to actually execute them. That's where my husband, Brent-the-brain comes in. He did some thinking and came up with a plan to make my sliding mirror dreams come true.
Here was our process:
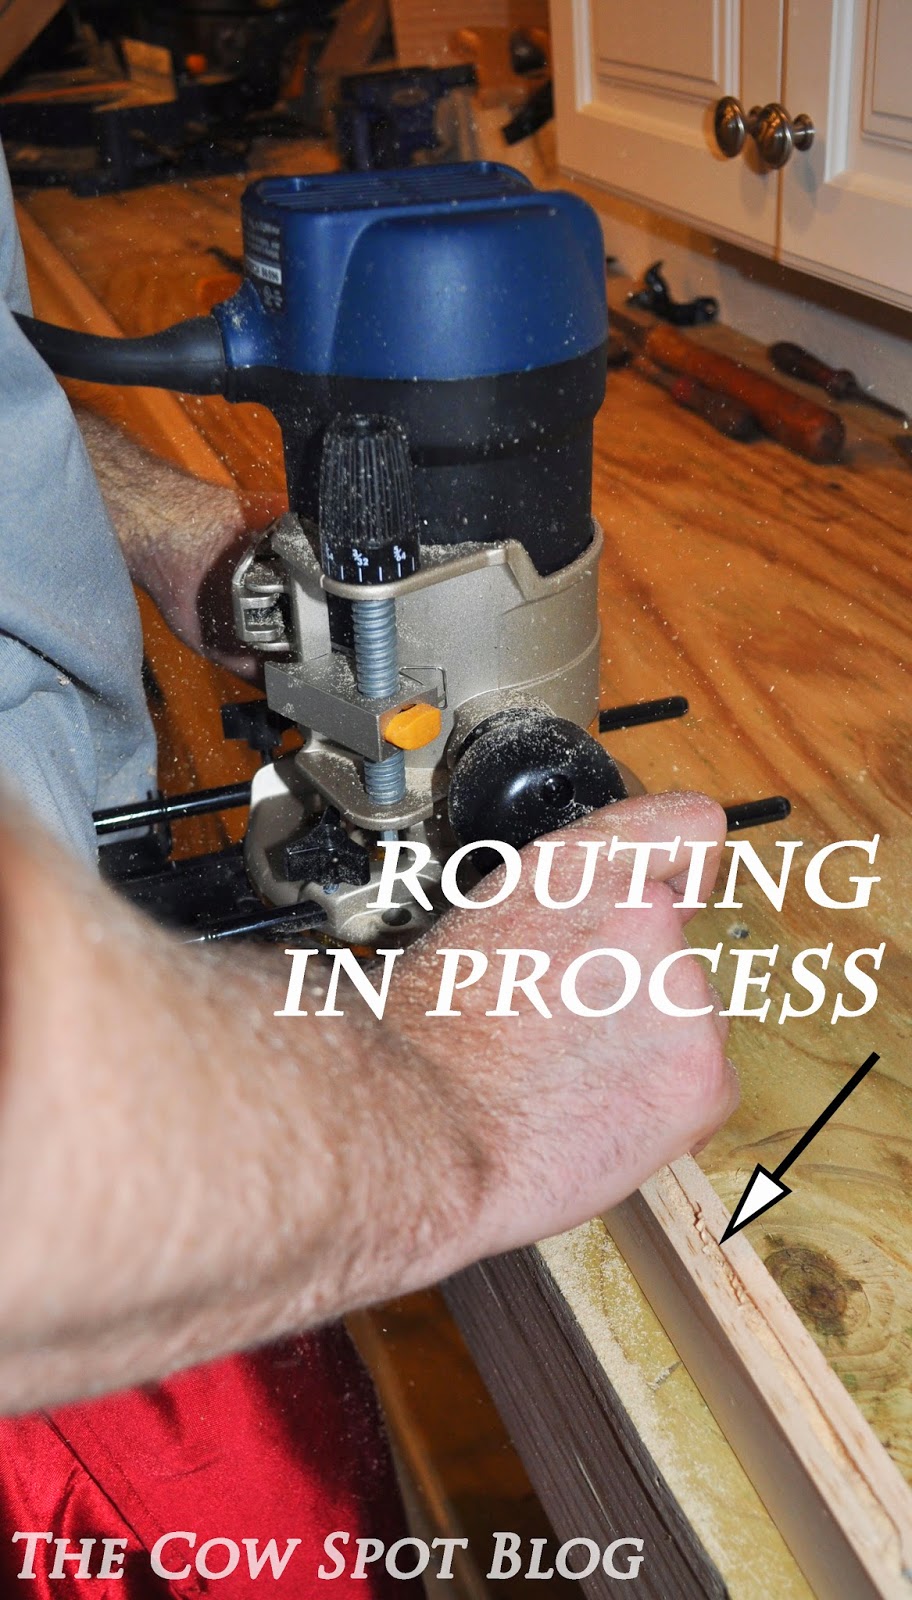
We bought some 2" x 1" pine lumber for the mirror frame. Using his router, Brent bored a 1/4" channel down the center of each piece to house the mirror glass.
We purchased a 16" x 60" mirror, so Brent miter cut the pieces of the frame and then used a joiner tool to fasten the frame together.

Once assembled we sanded the entire frame smooth.

Next Brent started assembling the track mechanism using a 2" x 2" and some cute little wheels purchased at Home Depot.

Once all pieces were assembled, we stained the wood using Varathane's Ebony stain. We wanted the mirror frame to be very dark so it would blend with the black pipe.

We let the pieces dry and then Brent slid the mirror glass into the frame. Luke was always close by supervising the progress. He like mirrors too, I mean the man is wearing a tux 24/7. He likes to admire his studly self.


Next up we installed the plumbing pipe across the length of the closet. For this piece we used the 1" thick pipe and fastened it to the top shelf using U-bolts.

Below is the finished track mechanism. The pipe fits perfectly between the 4 wheels for a gentle slide.

Brent fastened the sliding mechanism to the back of the mirror.
*Alert*Alert* we have our first Shirtless-Shearer sighting of the season!

And then attached it to the pipe.

Below is a little video we did to demonstrate how the mirror works.
(if video has stopped, just reload this page)

Zip, zip from one side of the closet to the other. So simple and effective. I can now take the most perfect full outfit selfies, so obviously dreams are just coming true left and right around here :) We briefly worried the mirror would stick out too far and make the closet feel small and crowded but it doesn't. In fact the mirror actually gives the closet depth and makes it seem bigger. After living with the installation for a few days, we have no complaints - only praise for our new favorite toy!
Fun fact: This entire contraption cost under $100.


2 Appreciated Comments :
THIS IS AMAZING!
Thank you Katie!!
Post a Comment