Back on the home front, things have been chugging along. We have finally moved out of dust heavy projects and right into projects that provide instant gratification, like painting! HALLELUJAH - I can see the light at the end of the tunnel. Speaking of light, the living room didn't have one and that bugged us. Early on we decided adding a fan/light in the living room was a must. Over the past few weeks we have been deliberating over what style of ceiling fan we wanted. There are a lot of options out there with varying styles and colors to choose from.
Like I said, A LOT of choices....yikes!!
We knew we wanted a fixture that would not only serve as a functional component but would add another layer of interest to the space. I mean, if you're going to do it, you might as well do it right. Right? The living room is long, so we were afraid a regular ceiling fan might get swallowed up by the ceiling, adding zero interest to the space.

While we chewed on the idea of the twin breeze, we decided to get the space ready for the fan, electrically speaking. Since we didn't want to do any patch work to the plaster walls, we had to use the existing switches that were in the room. Originally one of the switches was wired up to some of the outlets in the room. With a little help from an expert (thanks Shawn & Sally) we bypassed the switch for the outlets in the room and used that switch to run our wire for the fan/light. As I have mentioned before, typically these older homes were built with no exterior insulation which worked in our favor in this case because it made it easier to snake the wire down the wall. We decided to run a 3-wire (black, white, red) from the switch to the fan. Although we decided to keep the fan and light on one switch, this will give us the option to break out each function on it's own switch if we choose to in the future.
Once we had the wire run the next step was to figure out exactly where we wanted the fan. Because we did not want to have to do any patch work in the ceiling we wanted to get this right the first time. We both agreed centering the fan/light would be best. To find the center, Brent first measured the room along the floor, width and then length. He marked the center of the space with a dime. Next, he tied a string to a weight to create a pendulum. He held the string to the ceiling to see where the weight fell.
When the weight hung directly over the dime, he knew he was in the center. So he marked a small "x" on the ceiling.
We purchased a fan mounting kit from Home Depot. Note: if you are trying to mount a fan, the normal mounting brackets are too weak, don't meet code and won't support the fan. For pre-existing construction we were told the brace pictured below is the best option.
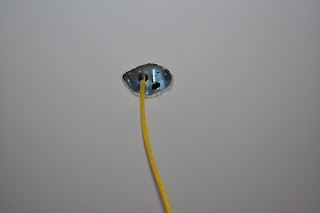
Brent then took the electrical box and traced it around his center point in the ceiling to determine how big of a hole was needed. Using a drywall saw, Brent cut the hole and inserted the mounting bracket between the ceiling joists and ran the wire into the electrical box.
With the hole cut and the electrical set up we were ready to move forward with buying and hanging our fixture. We both agreed, the twin breeze was our favorite option so we headed to Lowe's to pick it up.
Once we got the fan back to the house it took about an hour to put it together and get it hung.
TA-DA! We are are very pleased with the end result. The addition of the fan already makes this room look and feel more complete.
So, there you have it, another little piece of progress. We can't wait to finish the painting and start getting some furniture moved in. With each project we complete this house feels more and more like a home!


3 Appreciated Comments :
The Cow Spot: Blown Away >>>>> Download Now
>>>>> Download Full
The Cow Spot: Blown Away >>>>> Download LINK
>>>>> Download Now
The Cow Spot: Blown Away >>>>> Download Full
>>>>> Download LINK ZT
Thank you for sharing your captivating story and reminding us of the joy that can be found in unexpected moments and experiences. Your blog post inspires us to embrace new adventures, explore local gems.
https://www.promocodehq.com/blog/how-to-save-10000-in-6-months/
I stumbled upon your intriguing blog post titled "Blown Away," and I must say, your storytelling and experiences are captivating! Although your post doesn't directly touch upon "Cheap Restaurants For a Group," it got me thinking about how finding budget-friendly dining options can enhance our overall experiences, just like the adventure you shared in your blog.
https://www.frugalishness.com/cheap-restaurants-for-a-group/
Post a Comment