Well, we are finally here.....the FINAL reveal of our Outdoor Kitchen Series. So,
last we talked the outdoor kitchen was a few stack stone layers short of being complete. But, it was missing the cherry on top, the pizza oven.
To get the ball rolling on the pizza oven we first had to determine how large to make it, we settled on a diameter of 30". This dimension was basically pre-set by the size of the countertop slab and the estimated thickness of the brick pavers and stone facade we had in mind.
Prior to laying any bricks, Brent measured, made some marks on a piece of plywood, drew the 30"circle and then cutout the template.
We set the template in place, which was nice to have as a visual to see how large the piece would be once on the countertop. We wanted to make sure it was in scale with the space.
Next, Brent added pavers around the template, essentially tracing the shape.
As we began to think about the dome, Brent planned to make a mold to ensure we got an even sphere from the brick pavers. The plan was to cut flexible trim pieces to create this dome.
To do this we had to revisit high school geometry and by we I mean Brent, because math was never my favorite. Hold on to your hats, we're about to get technical:
The circumference of a circle is 2 * pi * radius. Based on a radius of 15", the circumference of the entire sphere would have been 94.25", however since we were only cutting strips to account for 1/4th of the sphere, we only needed them to be 23.6" each.
That made my head hurt just writing it.....
Once the strips were cut, Brent attached them to a center pillar....
...and we had the skeleton of the dome.
Once the dome template was finished it was put aside and we went to work on the floor of the oven. Brick pavers were used for this area as well and we got all fancy and decided on a herringbone pattern. Of course this meant more measuring, cutting and
dust, lots and lots of dust.
Once the floor of the oven was complete the dome template went back in and we started building up the walls, again using the brick pavers.
The first few rows were relatively straight, so we didn't need to use the dome template; but after the third row of brick the template was necessary to ensure we captured the proper shape of the dome. We used cedar shims to help form the curve.

As you can see in the pictures, we are using basic brick pavers for the form of the pizza oven. Midway through the process my PapaJack brought up the subject of fire brick. We did some research and found two products that are commonly used in high temperature situations, fire brick and fire clay. Fire brick is a block while fire clay is a mortar set. However, neither of these products are carried by major home improvement stores (Home Depot, Lowes, Ace, etc.) but we found a local construction supply store that carried the fire clay. Because we had already purchased all the brick pavers from Home Depot we decided to proceed with the brick pavers to form the dome and planned to coat the entire inside and outside with the fire clay to ensure heat protection.
Layer by layer the pizza dome took form.
Once the pizza oven was completely formed, we coated the entire outside with the fire clay to ensure heat resistance.
Next, we needed a door for the pizza oven.
We used the template previously made up to create the opening to the pizza oven.
Added some simple gate hardware...
and wah - lah a door!
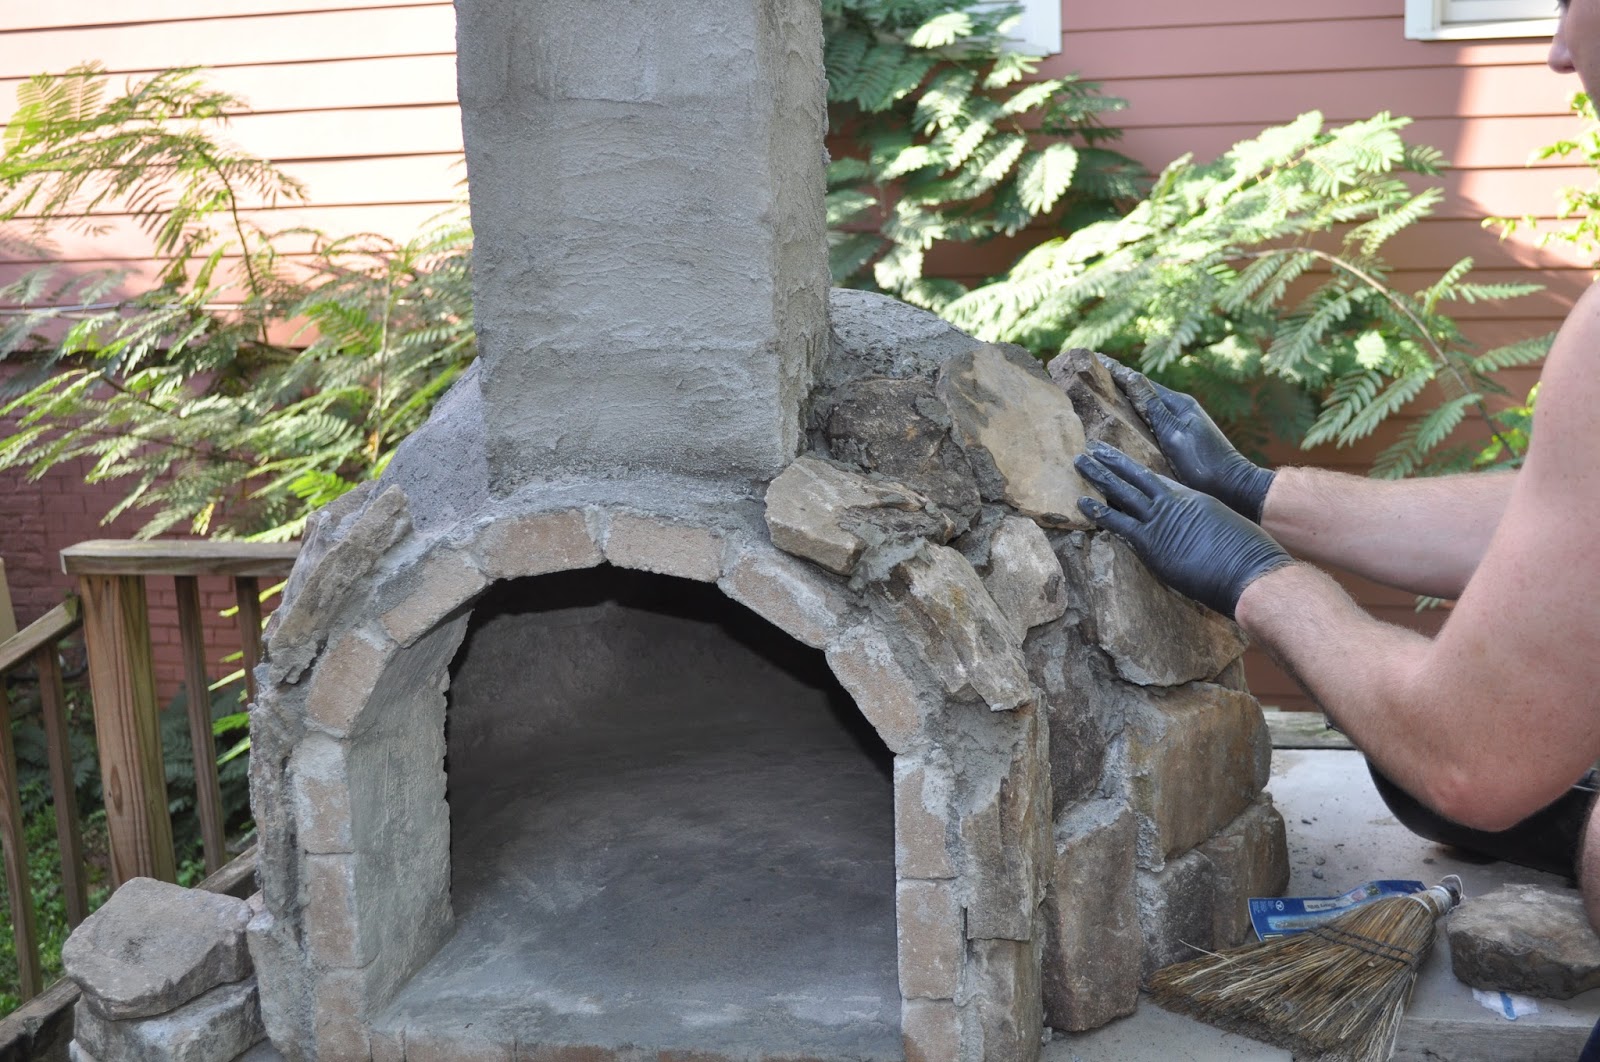
Now we were ready to add the stone. Every night Brent would add a layer all the way around the dome while finishing up the base along the way.
Using the same brick pavers used to make the pizza oven frame we created our smokestack (chimney) cap. The pavers were cut in half to create the base of the chimney cap. When making any smokestack the height and width of the smokestack is key in ensuring proper air flow throughout the chamber.
Once the legs were installed we topped it off with a large flat stone.
A few more layers of stack stone, some serious sweeping and cleaning and a firewood search (it's seasonal...who knew...) later and we were DONE!
So, for those of you just joining us, this is what we started with....
And here is where we are today.....
Ta- DA!!!!
Pretty sweet transformation, huh?
Here's the view looking out from the solarium.
We installed a friendly lion head bottle opener to the side of the cabinet and added this leafy plant.
Here's a close up of the pizza oven.
So, to answer the question I know you are all wondering....Yes, we have already had a test fire in the pizza oven and yes, it works!
I did catch Brent sitting and staring at this outdoor kitchen for a good 15 minutes earlier today. He claimed to be "watching the fire" but I think he was admiring his work. Who could blame him? This outdoor kitchen is the bomb dot com and we plan to enjoy the heck out of it!